Let’s be real—kids don’t need fancy, store-bought puppets that cost as much as your weekly coffee budget. They’d rather make something messy, silly, and totally their own. That’s the real magic of DIY puppets—they’re fun to make, spark endless pretend play, and (bonus!) secretly build fine motor skills and creativity.
I’ve spent more than a few rainy afternoons turning socks, spoons, and brown paper bags into goofy little characters with my niece. And trust me, when your “sock dragon” suddenly breathes imaginary fire, you’ll realize you’ve just unlocked hours of screen-free entertainment.
So, ready to get crafting? Let’s talk about 10 easy DIY puppet ideas for kids that are so fun, you might end up making one for yourself too. (No shame—DIY puppet theater is absolutely a grown-up sport too).
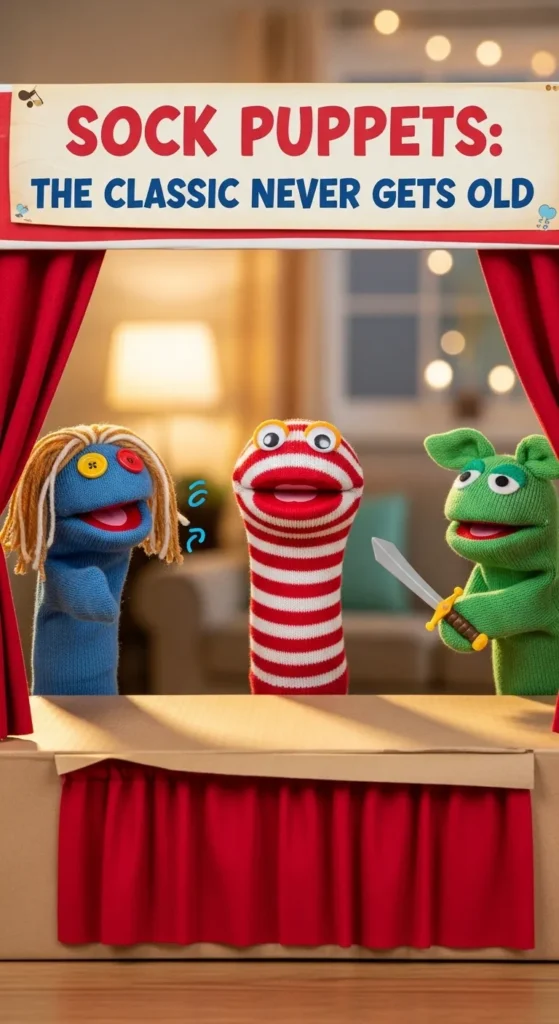
1. Sock Puppets: The Classic Never Gets Old
Ah, sock puppets—the OG of homemade puppet greatness. You literally just grab an old sock, glue on some googly eyes, and boom, you’ve got a character ready for its Broadway debut.
What You’ll Need:
- Clean old socks (bonus points if they’re colorful)
- Googly eyes or buttons
- Felt or yarn (for hair, tongue, or clothes)
- Glue or a hot glue gun (if you trust yourself not to burn your fingers—again)
How to Make It:
- Slip the sock over your hand to see where the “mouth” will go.
- Use felt or paper to create lips or a tongue inside the mouth area.
- Glue on eyes and hair—maybe even a mustache if you’re feeling fancy.
Pro tip: Let the kids name their sock puppets. Ours ended up with gems like “Mr. Picklepants” and “Sir Fluffy Socks.”
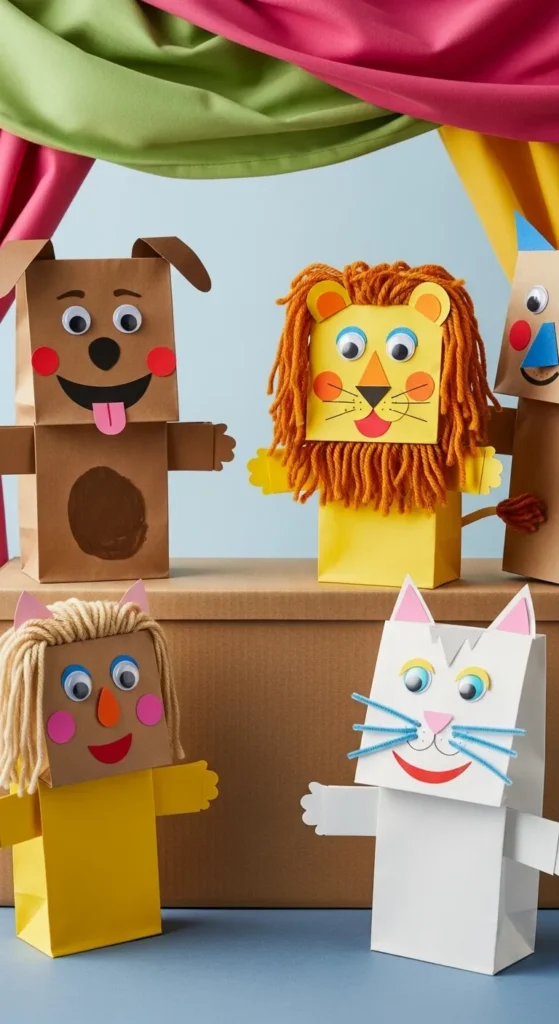
2. Paper Bag Puppets: Simple, Silly, and Seriously Cute
Paper bag puppets are perfect for preschoolers. They’re quick, colorful, and (unlike your kid’s last glitter explosion) super easy to clean up afterward.
You’ll Need:
- Brown paper lunch bags
- Construction paper
- Glue stick
- Markers, crayons, or stickers
Steps:
- Lay the bag flat with the flap facing up (this becomes the puppet’s mouth).
- Draw or glue on eyes, nose, and a big smiling mouth.
- Add a hat, tie, or bow using paper cutouts.
You can make animals, people, or even monsters. IMO, the monster ones are the most fun—especially when they “eat” your snacks during playtime.
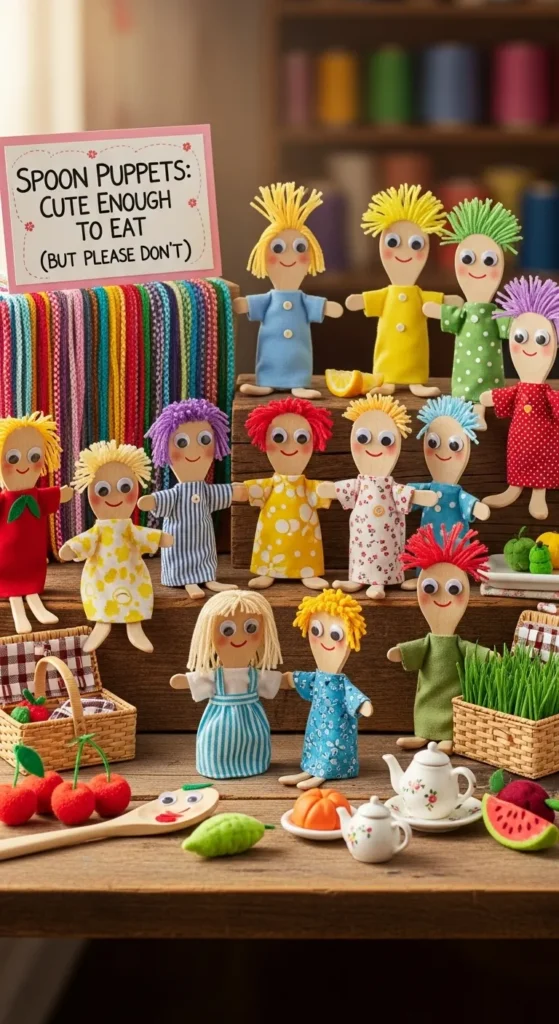
3. Spoon Puppets: Cute Enough to Eat (But Please Don’t)
Wooden spoon puppets are ideal if you’ve got a kid who loves storytelling. They’re sturdy, easy to handle, and look adorable with a bit of yarn and fabric.
Supplies:
- Wooden spoons (cheap ones work best)
- Markers or paint
- Scrap fabric (for clothes or capes)
- Yarn (for hair)
- Glue or tape
Directions:
- Draw a face on the spoon’s round end.
- Wrap a piece of fabric around the handle like a cloak.
- Add hair or accessories with glue.
These puppets make great characters for fairy tales—imagine Princess Spoonella and Sir Stir-a-Lot saving the kitchen kingdom!
4. Finger Puppets: Mini Magic for Tiny Hands
Finger puppets are small, portable, and completely adorable. Kids can create entire puppet families that fit right in their pocket.
What You’ll Need:
- Felt or construction paper
- Scissors and glue
- Markers for faces
- Optional: thread and needle (if you want them to last longer)
Instructions:
- Cut small rectangles from felt that fit around your child’s finger.
- Glue or sew the sides together, leaving the bottom open.
- Decorate with eyes, ears, and tiny hats.
Finger puppets are perfect for quick puppet shows or storytelling time. And if one goes missing? Well, it’s probably hiding out in the toy box with the missing socks.
5. Stick Puppets: The Easiest Crowd Favorite
Popsicle stick puppets are like the snack-time version of puppetry—super easy, fast, and instantly satisfying.
You’ll Need:
- Craft sticks or ice cream sticks
- Paper or cardstock
- Glue and markers
- Tape
How to Make:
- Draw characters on paper (people, animals, aliens—go wild).
- Cut them out and glue them onto sticks.
- Decorate with markers, sequins, or washi tape for flair.
Bonus idea: Create a full story cast—hero, villain, and sidekick—then build a mini stage using a shoebox. Instant puppet theater!
6. Shadow Puppets: Theater Magic with a Flashlight
Want to feel like a movie director with zero budget? Try shadow puppets. All you need is a flashlight, some paper cutouts, and a dark room.
Supplies:
- Black construction paper
- Scissors
- Tape or straws (for handles)
- A flashlight or lamp
Steps:
- Cut out shapes—animals, trees, people, anything!
- Tape each shape to a straw or stick.
- Turn off the lights and shine a flashlight on the wall.
Boom! Instant shadow theater. Ever tried doing a dragon fight with paper cutouts? It’s surprisingly dramatic
7. Glove Puppets: One Hand, Five Characters
If you’ve got an old glove lying around, you’re halfway there. Glove puppets let each finger become a unique character, making them perfect for nursery rhymes or storytelling.
You’ll Need:
- A glove (cotton works best)
- Felt or fabric scraps
- Glue
- Markers or buttons
How to Make:
- Assign each finger a “character.”
- Glue on felt cutouts for eyes, ears, or hats.
- Decorate the palm area as a backdrop (like a garden or castle).
Try singing songs like Five Little Monkeys or Old MacDonald—each finger can play a role!
8. Toilet Paper Roll Puppets: Trash to Treasure
Who knew empty toilet paper rolls could become such fun little puppets? These are eco-friendly, easy to decorate, and weirdly satisfying to make.
Supplies:
- Empty toilet paper rolls
- Construction paper
- Paint, markers, or stickers
- Glue
Directions:
- Paint or wrap the rolls in colorful paper.
- Draw or glue on faces and accessories.
- Add paper arms, yarn hair, or pipe cleaner hats.
Create a whole puppet family from your recyclables. Trust me, even your kid’s “toilet roll superhero” will save the day from boredom.
9. Paper Plate Puppets: Big Faces, Bigger Laughs
If your kids like bold, expressive characters, paper plate puppets are a win. They’re great for group activities and perfect for preschool classrooms.
You’ll Need:
- Paper plates
- Paint, markers, or crayons
- Popsicle sticks
- Glue, yarn, and decorations
How to Make:
- Draw or paint a big face on the plate.
- Glue a stick to the bottom for a handle.
- Add yarn hair, ears, or even a hat.
Pro tip: Make a bunch, then let the kids act out stories like The Three Little Pigs or Goldilocks and the Three Bears.
10. Animal Puppet Socks: Cuteness Level = 100%
Okay, I know I already mentioned sock puppets—but animal sock puppets deserve their own spotlight. Think of it as the glow-up version.
Supplies:
- Socks (different colors for each animal)
- Felt and fabric scraps
- Glue
- Buttons, pom-poms, or googly eyes
How to Make:
- Pick an animal—frog, cat, elephant, etc.
- Cut felt shapes for ears, noses, or snouts.
- Glue everything on and let it dry.
You can even make a full zoo and teach animal sounds while you play. Warning: uncontrollable giggles may occur when your kid’s “sock elephant” starts sneezing loudly.
Bonus Tip: Build a Mini Puppet Theater
If your kids get hooked (and they will), make a simple puppet stage out of a cardboard box. Cut out a large rectangle in front, paint it like a theater, and hang a small piece of cloth for curtains.
Instant stage. Instant fun. Maximum applause guaranteed.
Why DIY Puppets Are Totally Worth It?
Aside from the fun (and mess), DIY puppets are fantastic for child development. Here’s why:
- Boost creativity: Kids invent stories and characters from scratch.
- Improve motor skills: Cutting, gluing, and decorating build coordination.
- Encourage communication: Shy kids often open up through puppet play.
- Teach recycling: You’re showing how to turn “trash” into treasure.
Plus, let’s be honest—when your child proudly introduces “Captain Sockbeard the Pirate,” you’ll melt a little inside. 🥹
Wrapping It Up
DIY puppets aren’t just crafts—they’re memories in the making. Whether it’s a sock puppet monster, a paper bag unicorn, or a shadow puppet dragon, each creation tells a story your child built from imagination and laughter.
So grab the glue, raid your junk drawer, and let your living room turn into a puppet workshop. Who knows? You might even find yourself backstage, doing silly voices, and loving every second of it. 😉